Chicken Kiev
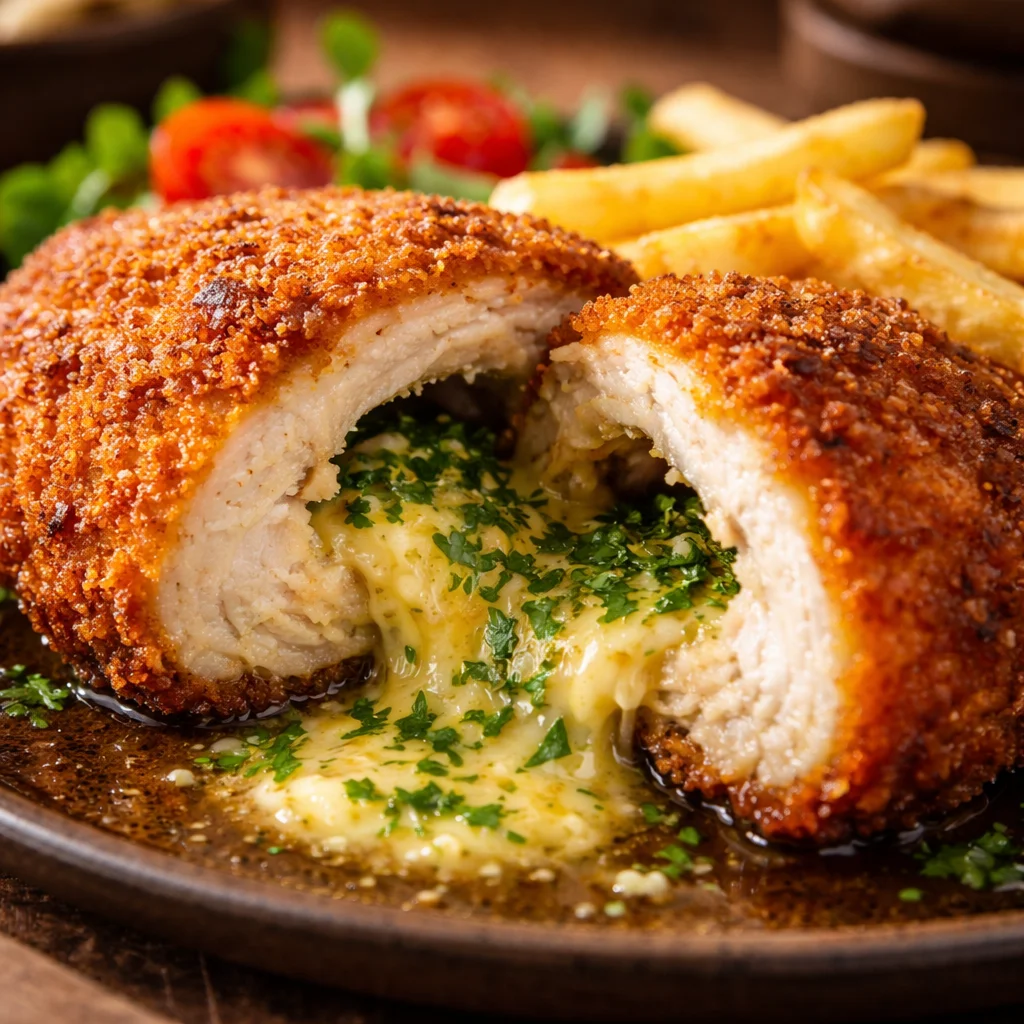
Chicken Kiev is a culinary delight that has won over countless hearts with its crispy exterior and mouthwatering, buttery center. Growing up, I remember the excitement in my home whenever we made this recipe; the anticipation of cutting through that golden crust to reveal the luscious herb butter inside was always a highlight. Whether it’s served for a cozy family dinner or prepared for special occasions, Chicken Kiev stands out as a classic favorite that never goes out of style.
Why you’ll love this dish
One of the many reasons to whip up Chicken Kiev at home is its sheer comfort and indulgence. This dish brings together simple ingredients to create something extraordinary, giving you that restaurant-quality experience right in your kitchen. It’s quick to prepare, making it perfect for a weeknight meal or a weekend surprise for guests. Plus, it’s budget-friendly without sacrificing flavor or nostalgia.
“This Chicken Kiev was a hit at dinner! We couldn’t get enough of the melted butter inside. A definite keeper!” – A satisfied home cook.
Step-by-step overview
Making Chicken Kiev is not as daunting as it might seem! With just a handful of steps, you’ll be well on your way to impressing your family and friends. The process involves preparing the herb butter, pounding the chicken for even cooking, and finally frying and baking it to crispy perfection. Gather your ingredients to set yourself up for success!
What you’ll need
To make Chicken Kiev, here’s what you’ll need:
- 4 chicken breasts
- 1/2 cup unsalted butter, softened
- 2 garlic cloves, minced
- 2 tablespoons fresh parsley, chopped
- 1 tablespoon fresh dill, chopped
- 1 tablespoon lemon juice
- Salt and pepper, to taste
- 1 cup all-purpose flour
- 2 eggs, beaten
- 1 cup breadcrumbs
- Vegetable oil, for frying
Feel free to substitute herbs or use gluten-free breadcrumbs to tailor this dish to your dietary needs!
Step-by-step instructions
- First, preheat your oven to 350°F (175°C).
- In a mixing bowl, combine the softened butter, minced garlic, chopped parsley, dill, lemon juice, and a sprinkle of salt and pepper until it’s well blended.
- Take a chicken breast and place it between two sheets of plastic wrap. Using a meat mallet, pound it to achieve an even thickness of about 1/2 inch.
- Take a generous spoonful of the herb butter mixture and place it in the center of the chicken breast. Fold the edges over the butter to securely seal it inside.
- Dredge the stuffed chicken in flour, making sure to coat it evenly. Next, dip it into the beaten eggs, followed by a thorough coating of breadcrumbs.
- Heat vegetable oil in a large frying pan over medium heat. Cook the chicken for about 3-4 minutes on each side until it’s golden brown.
- Transfer the chicken to a baking dish and bake it in the preheated oven for 10-15 minutes, or until fully cooked.
- Serve it hot and watch the melted butter ooze out as you cut into it!
Best ways to enjoy it
For a delicious presentation, serve your Chicken Kiev alongside fluffy mashed potatoes or a vibrant garden salad. Roasted vegetables are also a delightful addition. For drinks, a crisp white wine or a refreshing sparkling water complements the buttery flavor beautifully.
Storage and reheating tips
To keep your Chicken Kiev fresh, store it in an airtight container in the refrigerator for up to three days. If you have leftovers, you can reheat them in the oven at 350°F (175°C) until warmed through. For longer storage, you can freeze uncooked Chicken Kiev wrapped tightly in plastic wrap and aluminum foil for up to three months. Just remember to defrost it in the fridge before cooking!
Helpful cooking tips
- Ensure your butter is sufficiently softened for easy mixing; this will also help it melt properly inside the chicken.
- Pounding the chicken not only ensures even cooking but can also tenderize it, making for a juicy meal.
- To keep cleanup easy, consider using parchment paper on your baking sheet.
Creative twists
Why not switch up the flavor profile? Add different herbs like thyme or tarragon, or incorporate a bit of grated cheese into the butter mixture for a cheesy surprise. You can even try a spicy kick by adding crushed red pepper flakes. For a lighter version, consider grilling the chicken instead of frying it.
FAQ
How long does it take to prepare Chicken Kiev?
Preparation time is around 15-20 minutes, while cooking takes about 20-25 minutes, making it a quick and satisfying meal.
Can I make Chicken Kiev ahead of time?
Absolutely! You can prepare it and keep it in the refrigerator for a day before cooking, or freeze it for later.
Is there a substitute for butter?
If you want a healthier alternative, you can use olive oil spread or a dairy-free butter substitute, although it may change the flavor slightly.
Creating Chicken Kiev at home not only brings joy but also provides an opportunity to bond over an age-old recipe that’s loved throughout the world. So roll up your sleeves and get ready to indulge!

Chicken Kiev
Ingredients
For the herb butter
- 1/2 cup unsalted butter, softened Ensure butter is softened for easy mixing.
- 2 cloves garlic, minced
- 2 tablespoons fresh parsley, chopped
- 1 tablespoon fresh dill, chopped
- 1 tablespoon lemon juice
- Salt and pepper, to taste
For the chicken
- 4 pieces chicken breasts Pound to an even thickness.
- 1 cup all-purpose flour
- 2 eggs beaten
- 1 cup breadcrumbs Gluten-free breadcrumbs can be used.
- Vegetable oil, for frying
Instructions
Preparation
- Preheat your oven to 350°F (175°C).
- In a mixing bowl, combine the softened butter, minced garlic, chopped parsley, dill, lemon juice, and a sprinkle of salt and pepper until it’s well blended.
- Take a chicken breast and place it between two sheets of plastic wrap. Using a meat mallet, pound it to achieve an even thickness of about 1/2 inch.
- Take a generous spoonful of the herb butter mixture and place it in the center of the chicken breast. Fold the edges over the butter to securely seal it inside.
Coating and Frying
- Dredge the stuffed chicken in flour, making sure to coat it evenly.
- Dip it into the beaten eggs, followed by a thorough coating of breadcrumbs.
- Heat vegetable oil in a large frying pan over medium heat. Cook the chicken for about 3-4 minutes on each side until it’s golden brown.
Baking
- Transfer the chicken to a baking dish and bake it in the preheated oven for 10-15 minutes, or until fully cooked.
- Serve it hot and watch the melted butter ooze out as you cut into it!